Thursday, July 28, 2011

Keeping Busy (Yes I'm Still Alive) and a GIVEAWAY!

My apologies for the lack of posting. Because I know all of you are just in agony over it, I am posting a little sneak peak of what I have been working on. 

It's been busy over here. runny noses, rearranging rooms, registering for fall semester classes, and trying to re-vamp my Etsy site.

I have been over bow-making for a while so I have been trying to think of what else to put on my Etsy. I made some adorable pennant banners for my kid's room and had an idea. Why not these? They are fun and while I will have some ready made banners in my shop, I will mostly be focusing on custom banners, because it's much more fun to make EXACTLY what someone wants.

These are fun for parties of any kind, nursery or home decor, just loads of fun and you don't have to throw it away after the party!

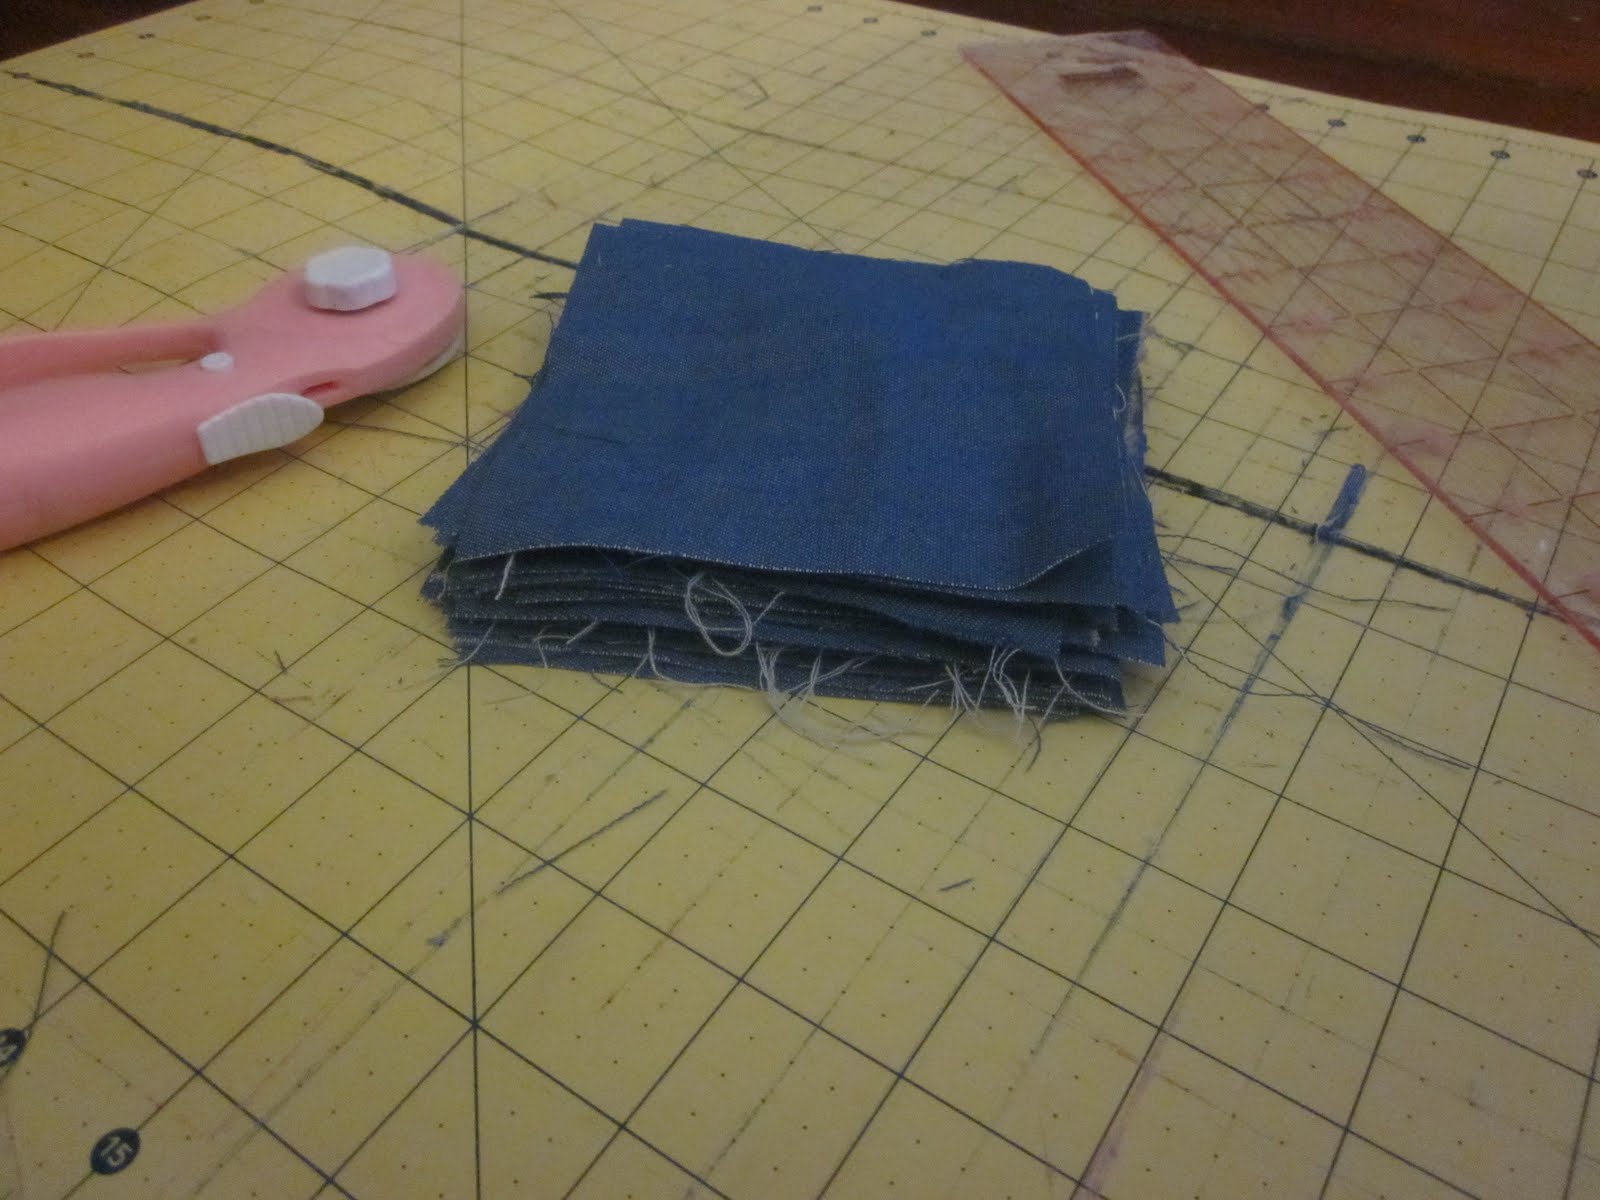
Oh and in the middle of all this fun, I discovered I left my camera charger in KC...so pardon the HIDEOUS photos taken with my iphone...

Here is a sneak peak of what I have done so far...

And here's the giveaway! This is the "Mini Pennant Banner" in some cute, sort of vintage-y yellow fabric (love my descriptions?)

This measures 52 inches long total and has 8 pennants on it that are 3.5 x 4 inches. Super cute! 

I promised another giveaway and this seemed perfect to kick off the re-opening of my shop :)

To enter, just leave a comment :) Make sure to include your NAME in your comment (Anonymous comments won't be included), and to make things fun, tell me what kind of banner YOU would like :)

I am aiming for Monday to re-open so I will keep the giveaway going till Wednesday at Midnight, winner will be announced Thursday morning.

Spread the word!

Have a wonderful day!

Friday, July 22, 2011

Making a Routine That Works

I meant to post this yesterday, but here it is today. Let's talk about actually creating and implementing your cleaning routine.


I recommend the Flylady because she tackles what the major issue is first. CLUTTER. Without addressing the clutter issues in your home you will have a hard time maintaining any semblance of order and it makes every task take 30 minutes longer.

Now I'll admit her website is REALLY overwhelming so let's just break it down a bit. I recommend taking some "Mommy Time" at your local coffee shop or happy place to sit down and figure all this out.


As overwheming as it may be print out the following from the Flylady website:

Zone Cleaning Lists 
Weekly Checklist
Before Bed/Morning Routines


With these things, start a Housekeeping Binder. I actually keep mine in my coupon binder. You can put your grocery list or to do list in it and any other useful household information. It sounds a tad ridiculous, but if you have these in a special place that you can get to easily, you will check it often, I keep mine on top of the microwave, or by my wall calendar in the kitchen.


Start asking yourself:


"What areas give me the most trouble?"
"What do I hate/love cleaning?"
"What doesn't apply to me?"
"What do I need to add?"
"What can I get rid of?"


Go through each list and modify as needed. Reprint with your changes and make sure you are being REALISTIC! Then get started!

What I love about the Flylady is that you can jump in wherever you are. We are in Zone 4 right now, the master bedroom. You can start today by just doing your 15 minute decluttering sessions a few days this week. Learn to declutter here.

Once you get a few rooms decluttered (this will take a few weeks) you will start to notice that rooms stay cleaner longer and it's easier to get the rooms in order.
 
There are definitely weeks where I fall behind, but it almost always ends in a Crisis Cleaning session to get me back on track. My life is SO MUCH easier, when I just stick to my plan. I have more time with my children and more time to do the things I enjoy.

I hope these past two days haven't been too boring, and I hope that everyone can get on board with this :)

Thursday, July 21, 2011

ADITLO - A Day In The Life of ME - Clean House Version

When I was preggo with Isabela I was active on a mommy message board and we used to do ADITLO all the time, mostly about our kids. I thought this would be a fun way to demonstrate how my cleaning routine works and hopefully it can help you figure out a routine that works for you. 

I know I tend to stress a "routine" for your housework. Sorry if it's overkill, but it works! I'm going on my second year of being a SAHM and this makes life EASIER. I share because I hope some mommy out there "get's it" and starts to enjoy life, instead of being stuck under a mess with their kids (no fun!).
So I have been really diligent with my routine so there isn't much mayhem and destruction to see...go figure...hope this helps!

7:00am - woke up to a very clean kitchen! Except for one pan (seriously needed an overnight soak) my kitchen was SPARKLING this lovely morning.

I check my weekly checklist and Zone plan daily to see where I am and plan what I want to accomplish.

Got my dishes put away in preparation for washing breakfast dishes.
Bed gets made and I shower and get ready for the day.
 It's only 8:45 and I realize I have over an hour till Pilates and the kids are fed AND dressed. It's a miracle!
 I was a slacker and didn't finish folding laundry last night. It stays on the bed so we can go play! (Don't forget to make time for fun!)
 More coffee for mommy :)

We play and then pack up to go to the gym! Because we were outside, the kids couldn't make a mess, but I will usually make sure the main living areas are tidy before I leave.
My floors need sweeping, but I clear away any toys before I head out.
 I toss some diapers in the wash before I head out as well :-/

11:30am - home and ready for lunch!

Lunch mess! Not too bad today (i'll try for more goo next time)

Let me interject here a note about the importance of cleaning the kitchen after EVERY MEAL. Believe it or not, I got this from Kate Gosselin. Even considering I handwash my dishes it took me less than 10 minutes to tidy the kitchen including sweeping the floor. Doing this after even the small meals, make the cleaning the kitchen in the evening a BREEZE!


While I tidy, the kids play together, also helps Isabela burn off some energy before she goes down for a nap.

1:00pm - Bela is down for a nap, but she decides to be a party animal for 45 minutes. Usually Lenny sits down and does a shapes or numbers worksheet, but he is still bouncy, so Lenny helps me sweep and dust my room, my zone task for today.


1:45pm - Lenny is down for a nap and I continue dusting the picture rail on the wall and around the windows. I plan to paint the trim this week...we'll see, haha!


 Sometime after 2pm, it's mommy time! Sneak peak at my latest project other than my quilt :)
 An hour and a half later, I'm done with sewing for the day and get my laundry put away. Woohoo.

The kids get up and we make a quick trip to Walmart and head home for an easy dinner of frozen Kashi pizzas (super good!) and salad.

Dinner Mess

I get the kids bathed and turn on their alphabet music CD so they can dance while I get the last bits of mess from the day cleaned up.
There wasn't much of a mess this evening because my kids slept till 4pm! Was hoping for some serious mayhem to show and an amazing after...no such luck.
 Before
 Before
 After
After

And my favorite part...
A clean kitchen!

It usually takes me about 15 minutes to go around the house and tidy things up. It's usually just toys and things so no biggie.

This was such a smooth day and the routine is REALLY starting to pay off for us. I am getting MUCH more time with the kids. We had time after baths and cleanup to play and watch Uncle Josh play in the Prayer Room :)
Lenny loves to watch "Ugle Josh play the ditar."

 If you made it this far, bless your heart! I hope this shows how following a method can make life easier with less time spent cleaning and more fun with the kids and family.


So how do you make a method work for you? Keep an eye out for my next post, which will be all about creating a routine that is PRACTICAL and works for your family.


Now go de-clutter something! And have an awesome day!

Tuesday, July 19, 2011

All About the Thread

When I first started sewing I really didn't give a whole lot of thought to the kind of thread I used. I just picked up whatever was the best price and went on my way.

After sewing for a few months I kept having problems with the bobbin thread becoming tangled. Like every. single. time. It was really frustrating and being a beginner at machine sewing, I spent a lot of time cursing my machine.

It was actually my mom that recommended changing threads. Seriously? The thread? Check out the photos on this interesting article about different sewing threadsI noticed the difference RIGHT AWAY. I use Gutterman threads, it is readily available at any Joann Fabrics and almost always 40% off too :)

Here is an example from my own experiment I used the typical brand (no names here but you know the one I mean, C&C).

I did this little experiment on the same project, same day. Yucky stitches! I also had a tangling problem about 1 minute into this line of stitches.

 This is my Gutterman thread. MUCH NICER.

For the longest time I thought it was me or my machine. I have a very basic, but very highly rated mechanical Brother machine. When my mom shared that she had similar problems with her machine (which is much nicer than mine), I knew that I should give changing threads a shot. It apparently solved her issues.

Now from the looks of this article not all of the C&C threads are bad, the 100% cotton thread has very few loose fibers and looks like a great choice.
It's kind of funny that the solutions for some things can be so small. I get plenty of cheap fabric at Walmart and it wears quite nicely. Apparently you can save on the fabric, but you have to spend on the thread. Go figure.

Take a good look at the article and post your thoughts and experiences :)

NOTE - this is not intended to diss any particular brand, but rather just my own experience :)

In Progress - Scrappy Denim Applique Quilt - Part II

All of the blocks are pieced together. I decided to put the squares together and then applique the rest of the denim squares so I could lay out the pieces before I did the rest of the appliques. 
 These are all the pieces laid out. I think I rearranged a few after I took this photo. It's actually looking much less wonky that I thought it would! It's probably going to be really cute! I am probably going to add a band around the entire thing of about 4 inches to add some uniformity, I just have to pick out that fabric for that, the backing, the binding and my filler. 

This has been an enjoyable project despite taking longer than one day :) I have a pattern picked out for my next quilt but I will be purchasing coordinating fabrics for that one.

So it looks like I will definitely get this done in one month, maybe less! More pics to come :)

Monday, July 18, 2011

Coupon Organization - Evolution of the Binder

So it appears that despite my best efforts, I may be in danger of needing to shift into the "baseball card holder" method of coupon organization. Keeping the entire ad is annoying, messy and I don't like having to clip as I go.

I keep my pages of printable coupons together, and that's working great, but the ads are just out of control. So I went and clipped everything I had left (excluding only Qs I know I will never use) and just divided them among the sleeves with the date and ad type. 

So for now, this is my ghetto-fied system. It's just so much easier to clip the ads as I get them and stick them in the sleeve by date and ad type. I am still not sure if I really want them in individual little pockets, but for now this will have to work. This week it seemed to work great, my couponing took less time, so I guess we'll see. 


So this is probably the 5th time I have changed my coupon organizing, and I am pretty sure it will change 5 more times :) So how are you all keeping your Q's organized? My couponing is just taking a lot of time lately, so I would love some new tips :)

Friday, July 15, 2011

Satin is Fun - A Flower Tutorial

I doubt my idea is remotely original (I know this cause I got the idea from today's Very Jane deal), and I know you don't need yet ANOTHER fabric flower tutorial. BUT, this one involves burning stuff, so it's cool :) 

DISCLAIMER - Myself or this blog is NOT RESPONSIBLE for you being silly with candles and burning yourself or your house down.

Ok, disclaimer out of the way!

 Grab some:
Satin fabric
A bit of felt
scissors
Needle/thread
Candle/matches
Glue gun 
Pearls, beads or other center embellisment
 I made a template for each two different petal sizes.
 This is my super technical method of stacking scraps together and pinning the template to them in order to cut out more than one at a time. It's best if the petals aren't perfectly cut.
 I kind of love the smell of burning satin in the afternoon...but just quickly run over the flame just till it starts to curl up. Go all the way around.

 Continue till you have a nice little pile of petals. I think I used 7 for the large and 5 of the small
 I cut a two inch circle and started hand stitching my petals on. Don't worry about the stitches, the next layer will cover them.
 For the second layer, it's easiest to just arrange the petals first and then do a couple stitches in the center to hold in place.
I sewed my pearls on and voila! All done.

 I hot glued a clip onto in and stuck it in my bun :)
I think after looking at it for a little while, I want to get the edges a bit more curled in, which will most likely result in me burning this thing, but we'll see.
 I have seen these on a couple blogs too, you do the same burning technique, but with different size circles. Going to try another with more layers to see how that turns out :)
Have a great day!

Tuesday, July 12, 2011

In Progress - The Scrappy Denim Applique Quilt

So when I was in KC, my mom took me to a really neat quilting store. It was amazing the quilts they had in the store and all the cool sewing notions and fabric.

It got me to thinking about my inability to take on a project that takes more than 2 sittings to complete. Like I prefer ones that take less than 2 hours. I have sewing ADD and I get bored FAST. Like I can't even stand to look at the same color thread on my sewing machine for too long. It's pretty bad.

About the same time, I was confronted with the huge stash of big random pieces of fabric that I have that are big, but yet too small to make anything other than 1,000 zippered pouches or every kind of fabric flower imaginable. 
 After it was all said and done, it ended up being far worse than this meager stack of fabric.

I needed a real project.
Or at least a way in which to purge enough fabric so my husband will let me buy all the amazing new fabric that I've been eyeballing :)
 Enter these charming little denim squares.

I had a little idea to make a simple 4 square quilt using one denim square in each square that had a little applique on it. I LOVE playing with fusible web stuff so this was perfect.

I ended up with 30 4.5x4.5 in squares. So doing the quilt 6 squares by 5 squares I get a 40x48 inch quilt. Really small and perfect for my first venture.

So here is what I have discovered.

#1 I need new blades for my rotary cutter.
#2 I also need a new cutting mat (there is literally a GASH in my mat)
#3 This is probably going to take a while. So I have therefore given myself a 1 month deadline on this project.

 If you have never tried to put 4 squares together, just sew together, RS facing along one side.
 I am trying pressing the seams out like this. It make the seams really flat.
 Take two of your 2 square pieces and put them RS facing and sew along one long side and press open and voila, a big square.
This is basically the gist of what its going to look like (Only have 7 complete squares at this point so not much to show.) 

I have to admit it's a little wonky looking and ridiculous at this point, I am thinking the most likely name for this quilt would be "Kitsch on crack". 

But who knows? This is just scraps after all.
If you are going to venture into quilting, pick up a quilting foot. This is the one for my machine. It makes those 1/4 inch seams a breeze!

Oh before you go, check out my awesome rig for my sewing machine pedal.
 Have you ever been at your machine sewing for a long time and the top of your foot starts killing? Well it's because your foot is locked at a funny angle and you are killing that muscle on the top of your foot. This totally ghetto prop puts my foot in a more natural position, so no foot cramps. Yay! I am sure there is a cuter way to do this, or pedals that don't make your foot do this, but this is free and it works!

So I have my work cut out for me. And it's possible this could be the most hideous quilt ever, but I have to say, my points are looking super awesome and even so I don't really care :)