Showing posts with label boys sewing projects. Show all posts

Friday, June 17, 2011

Journal/Book Cover Tutorial

Now I don't think this is revolutionary, but I wanted to make a cover for my bible, which I have had for 11 years and love very much. The pages turn perfectly and it feels lovely. I know. Weird. But I know you know what I mean.

This can be modified for any size book, just adjust the measurements.  Let's get started.
Materials
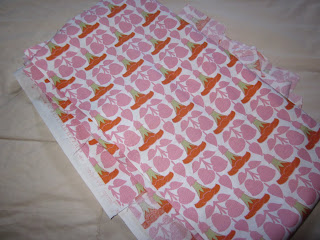
2 pieces of coordinating (or uncoordinating)fabric
a good length of skinny elastic
a pretty button
a scrap of velcro
Measuring
Measure from the top to bottom of your book
Measure around the book (vertically), the COVER only 
The thickness of your book

After you have these measurements add 1 inch to the first two measurements.

Add about 2 inches to the thickness measurement (*Note* You could also make this "reversible" and omit the strap.)

My cover pieces ended up being 13 1/2 x 9 1/2 inches
The strap piece was 3 inches and I just made a 3 inch square for that piece.
 Go ahead and pin the cover pieces together with right sides facing. Mark a 4 inch opening on one of the short sides. This will be the opening you will turn it out from and where you will place the strap and elastic.
 Make a tube with your strap piece by folding in half right sides facing and sewing along the open side.
 Fold under one of the short sides and topstitch all around. Add one side of the velcro as well.
 Sew all around your fabric (except for your marked opening) using a 1/2 inch seam allowance. Clip the corners.
 Turn right side out and press really well. Don't skip this step!
Figure out where you want your strap and pin inside the opening.
Ok. Now we come to the elastic. I am sure there is a far more clever way to do this, but I wanted to ensure the elastic wouldn't be too loose or tight and to me this was the best way.
 Cut your elastic so it hangs over the edge a bit on each side.
  Decide where you want the elastic.  Mine is about 1.5 inches from the edge. Using a seam ripper carefully cut an opening and place your elastic how you want it. Repeat on the other side.

This is where you have to be careful. Topstitch around the entire cover being careful not to go over the elastic. You can pull it away from the needle and then at one point I had to pull the elastic through so I just carefully picked up the foot and needle and slid it through. It's actually not too hard because the elastic has a lot of give.
 Wrap your cover around your book and determine where to place the other side of the velcro. Mark it and pin and place and stitch it on. I hand stitched a button on the top of the strap just for decoration.
It turned out sooooo cute! It reminds me of when I was young and it was really cool to have a bible carrier. I had this insanely ornate one that was quilted, with lace and ribbons and the whole nine.  This is much sleeker, and maybe it's kinda dorky...but I never said I wasn't a dork ;)

This would also be nice to cover a plain journal with and give to a friend :)

Friday, April 29, 2011

Pretty Pinafore

I think I told you all a couple weeks ago that I purchased One Yard Wonders.  Well, I think I also told you that I mis-cut the fabric while attempting to make it.  So, because I was dying to make this particular dress with that certain fabric, I decided to try to make it and see if the shortages would make a difference in the skirt portion.

My bodice was perfectly cut, but I was a little short on the skirt fabric.  So I decided to just go for it and see what happened.  Well, it turned out PERFECT.  I added a band of white fabric to give a little extra length, but it probably would have been fine without it.  Because the smallest size in the pattern was a 2T, it's a tad big in the bodice, but it's soooo freaking cute!  I HIGHLY recommend the book based solely on this project alone.  The bodice came out immaculate, the neckline is crisp and straight.  It was a blast to sew!  What I love about this book is that you can buy any random yard of fabric and find something to do with it.

So enjoy the photo parade!  Isabela is the most uncooperative child and I am the worst photog on the planet, but we got some great shots.


I really should have one of my amazing photog friends try and get some better shots of her in this...any takers?  Or maybe some lessons for me...haha!

Wednesday, April 20, 2011

Crafting Recap

I was finally going through all my sewing stuff and realized that there were quite a few projects that I hadn't shown on my blog.  I so wish to be one of those awesome craft bloggers that comes up with amazing projects on their own...but I am usually using other people's tutorials and combining random patterns together.  Sometimes it works...most of the time not, so here is what has worked.  I have all the links so you can make your own too :)


This is probably the tiniest pillowcase dress I have ever made (fabric is by Anthology and Kumari Garden for Dena Designs).  It's a shower gift, along with these awesome burp cloths.  The back side is super soft terry cloth, perfect for mopping up huge spit-up messes!  I have been using the Prudent Baby Pillowcase Dress tute for a while now and I like it.  However, my friend recently used the Habitual pillowcase dress pattern (you can see the gorgeousness here)  so of course I have to give that one a try :)  I love the look of it and the sash is sooo lovely!


This was done using the Prudent Baby's Layer Cake Skirt tute.  It turned out great except I was attempting to make it a bit smaller for Bela and it turned out too short.  So if anyone is interested...it's available!  I love this Joel Dewberry fabric too much to not see it on some other cutie!

This little top turned out sooo much cuter than I anticipated.  I didn't have enough to make a dress so I made a spin off of a peasant top.  It is so cute on my little Bela.  One of those rare moments when one of my "genius" ideas actually works.  Again using Anthology and Kumari Garden fabrics.  Not giving this one away :)

I think I showed you all the bow-tie for my son's easter outfit.  Here is the little coordinating clip I made for Bela.  It's hard to see the details but its a fabric yoyo with some trim and a fabric covered button.  Turned out way cute!  I used this tute for the fabric yoyos.  Super easy and you can do soooo much with them.  So go and make a whole bunch!


This is a horrid pic, but I am in LOVE with this dress.  Another great Prudent Baby tutorial.  My only problem was actually making the pattern.  It's lots of angles and I'm still not sure I got it quite right.  I also discovered AFTER making the dress that I cut the hem completely crooked (easy fix) AND I used the fabric upside down (can't fix).  It's not obvious when it is on...still it's completely adorable and I want to make several more...maybe even a top version :)

So just because I'm me, no blog post would be complete without some sort of major mess-up on my part...I ended up purchasing MORE of the lovely Tanya Whelan fabric I used for my kid's easter-wear accessories...


 I had plans to make this adorable pinafore that was in a sewing book I recently purchased...well they have these handy diagrams of EXACTLY how to lay out the patterns to minimize waste.  Well instead of just folding the fabric up 8 inches for the bodice pieces, I folded it in half.  So now I don't have enough for the skirt part of the pinafore...ugh!  Seriously!  I was so meticulous in laying out and cutting everything!  So who knows what will happen with these...

So this cutie-patooty project is on hold until more fabric can be bought :(

So that is all for now.  I hope you all got some links to some fun new projects and enjoy laughing at my crafting misfortunes!

Wednesday, April 13, 2011

Making Things Springy!

Spring (or rather summer if you are in Florida) is in full swing and something about summer makes me want to change everything in my house around.  Spring also means the end of spring semester and I am in the thick of it and really needed a break from housework and school work.

I have been meaning to organize my scrap fabric...

 This is not even all of it...

I found the tutorial for this wreath a LOOONG time ago and I lost the link when my computer was stolen so I cannot give proper credit.  I made this for my crafting corner in my room.  It's totally random and has no rhyme or reason.  You just take your foam wreath, square scraps (3 inches or so, doesn't have to be perfect, I just cut them randomly with scissors), wrap the scrap around the pointy end of a dull pencil, add a drop of glue to the end and stab it in.  4 TiVo'd episodes of 19 Kids and Counting later, you have this pretty thing.  It didn't make the dent in my stash I was hoping to make...so I guess I still have to organize it....

As a child, my favorite part of Easter was going to get our Easter dresses.  I love doing the same with my kids and I happened upon a great sale at The Children's Place a couple weeks ago and snatched up the kids Easter outfits.  I have been wanting to try out A Lemon Squeezy Home's Bowtie Tutorial and the adorable blue chambray button down I got my son was perfect for it AND the awesome Tanya Whelan Lilly fabric from her Dolce collection that I have been in love with lately.  Wow, what a great run-on sentence!  

It turned out ADORABLE and I cannot wait to take pics of them in their Easter get-up.  This tute was super easy and it came out as perfect as the photos.  I might add these to my store :)  A hairpiece for my Bela in the same fabric is in the works :)


So for more spring fun I decided to spruce up my table arrangement.  I have had this really amazing, but tall orchid arrangement that my friend made for me a few years ago on the table, but I wanted something shorter so I can see my son across the table.  I came up with this little number.


I gave the old flowers (excellent quality by the way, still in perfect condition) a cleaning and they now live in a tall vase on my mantle.  I love re-purposing!  The only thing I bought was the blue flowers.  I reused the moss and the floral dec foam.  


I am still not 100% on the arrangement I made...but it works for now.  I think it will have a new home as I have since decided that I want to put a tray with my salt/pepper shakers and napkin holder and other table essentials on a tray and mod podge it...I can't make up my mind for anything!

Hope everyone else is getting their homes bright and springy!  Remember to think outside the box and find creative ways to reuse what you already have :)